Sticker and Decal Application Guides
It is highly recommended to buy a card from our store for application, click here to purchase.
Dry Method
Step One: Ensure surface is clean and free from dust and oil, and dry surface thoroughly.
Step Two: Place and level the sticker on the surface where it is intended to be installed.

Step Three: Place tape vertically or horizontally across the middle of the sticker to act as a hinge, this must remain secure and can be fairly wide.

Step Four: Peel half of the stick to the hinge and tape it back.

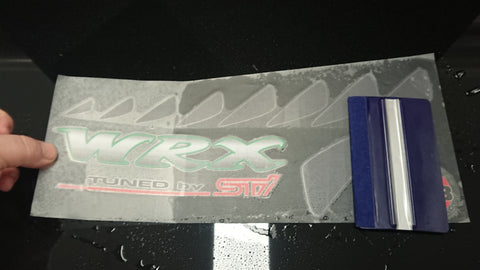
Step Five: Cut the backing paper off

Step Six: Remove the backing paper.

Step Seven: Be sure no paper dust or particles remain, clean the surface again while avoiding the sticker or decal.

Step Eight: Hold the application paper above where the sticker will be applied down.

Step Nine: Card the sticker down accross the surface carefully.

Step Ten: Peel the hinge off carefully without interfering with the underlying sticker or decal.


Step Eleven: Peel the backing paper off the other side while keeping the other side away from the surface.

Step Twelve: Holding the application paper or sticker straight and taught over the area it will come down, maintain tension and carefully card the sticker down and across.


Step Thirteen: Gently peel away the transfer tape starting from one corner pulling down at a tight angle. Watch closely for any bubbles, if so put the application paper back over and card again for protection of the sticker.


Wet Method
Using either J&J Baby Shampoo or a dish liquid (NOT anti bacterial hand wash - must be a pure soap), add a small drop or two to 500ml of water as a lubricant, in a fine mist spray bottle.


Step One: After cleaning the area for application, remove the backing paper from the sticker or decal application paper entirely, laying the item out on a clean table face down can help. Make sure when removing the backing, no part of the sticker or decal remains stuck to the backing and it tears.

Step Two: Spray a fine mist over the sticker or decal, you can also hold the sticker or decal up in the air as you spray with a fine mist from 30cm away, spray the back where the adhesive is.

Step Three: Place the sticker or decal face down and carefully card the water out from one side to the other while holding the application paper taught.

Step Four: Card out all excess water while application paper is over the sticker or decal, this acts as protection from the pressure and any scratching.

Step Five: Carefully remove application paper, be slow at first and assess if the sticker or decal will lift, depending on the amount of water used, the surface quality, time of day, ambient temp and overall amount of water removed through the carding process. the application paper may still lift the sticker or decal, if so give it some time for the water to dry, a heat gun or hair dryer can speed this up, continue to card the sticker or decal while waiting for the moisture to wick out.

Step Six: Assess if any water is still trapped and card it carfully by reapplying the paper in the area and carding with careful pressure. If you did all correctly you should have a bubble free sticker or decal applied.

Step Seven: clean the area with a clean and dry cotton or microfiber rag.

